Destruction Shape and Decal Customization
The Realtime Destructible Mesh plugin supports customization of the destruction shape and a decal system for enhancing visual fidelity. The following steps are required to use this feature:
- Create a Impact Profile Data Asset instance
- Edit the destruction shape and decal data using the Impact Profile Editor
- Register the data asset instance in Project Settings - RDM Settings
- Set the Config ID and Surface Type for the Projectile and Mesh, respectively
In the Content Drawer, select Add → Miscellaneous → DataAsset and create a Decal Material Data Asset instance.

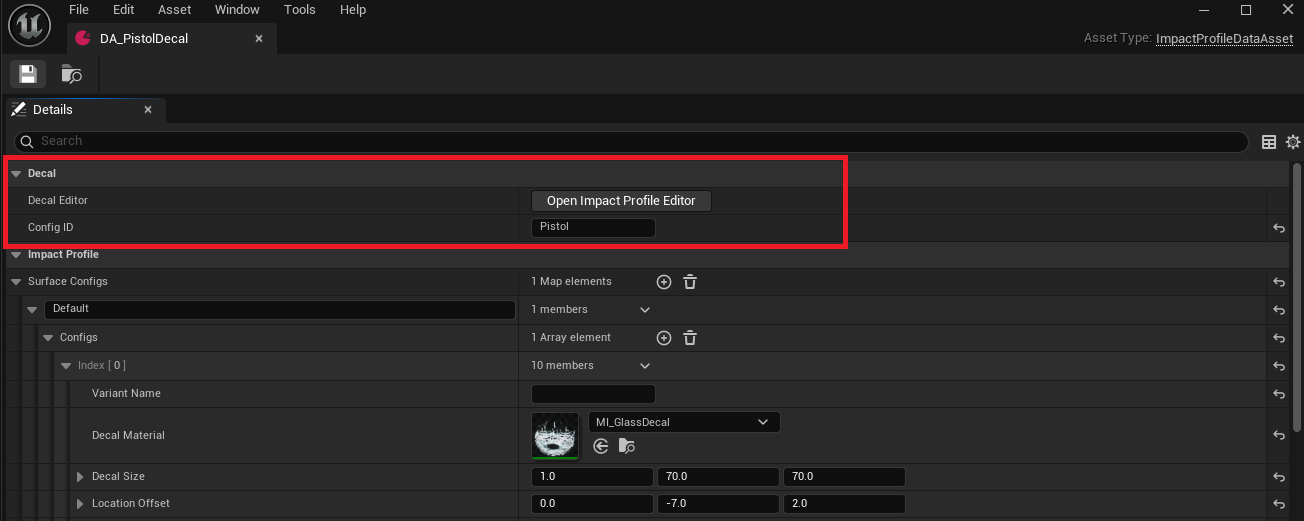
When creating an instance, the Config ID is set first. Each Destruction Projectile Component identifies which Impact Profilel Data Asset to use for destruction effects through the Config ID.
Surface Configs define the destruction shape and decal to be used based on the Surface Type defined in the mesh. Pressing the Open Impact Profile Editor button provides a preview and allows for detailed setting of Surface Configs.
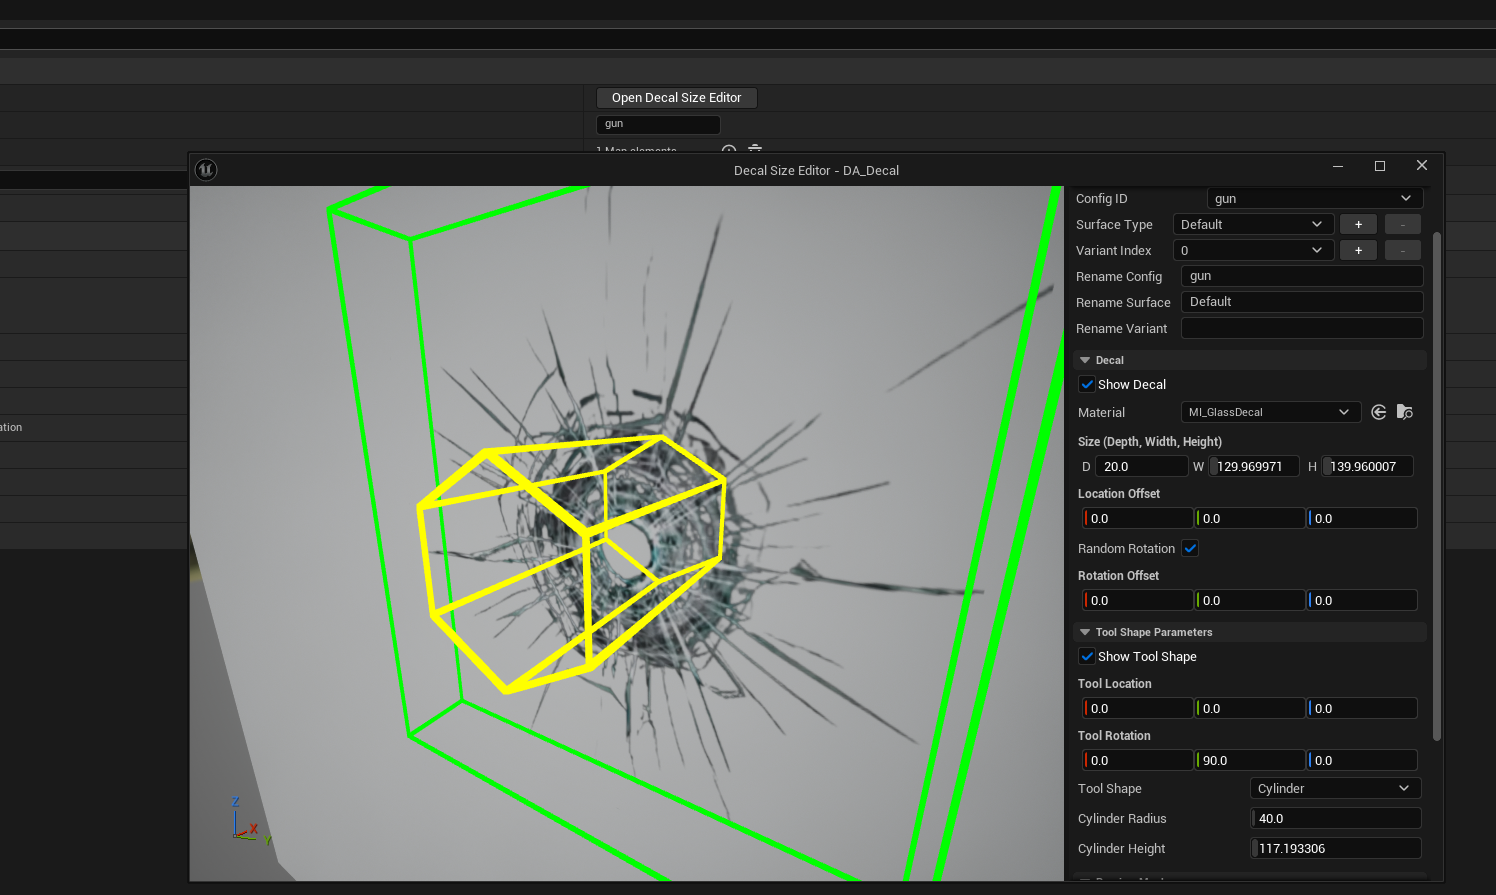
The contents that can be edited in the Impact Profile Editor are as follows:
- Type and transform of the Tool shape (the shape destroyed by the projectile)
- Material to be applied to the decal created at the point of impact and the decal’s transform
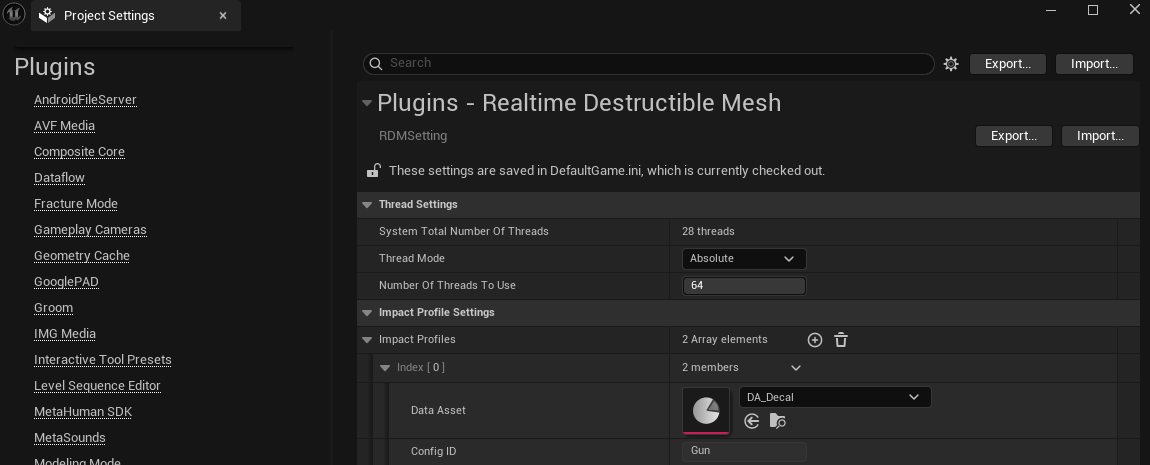
Once the settings are complete, open Project Settings and add the newly created Impact Profile Data Asset to the Impact Profile Settings - Impact Profiles array.
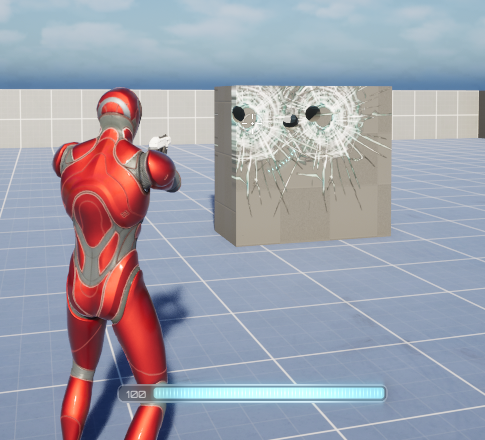
Finally, set the Decal Config ID of the Destruction Projectile Component and the Surface Type of the Realtime Destructible Mesh. When the projectile and the mesh collide, the Impact Profile Data Assets will find the appropriate Config ID and Surface Type pair, and mesh destruction and decal spawning will occur according to the settings.

▲ Decal Config ID property in the Decal category of the Destruction Projectile Component.
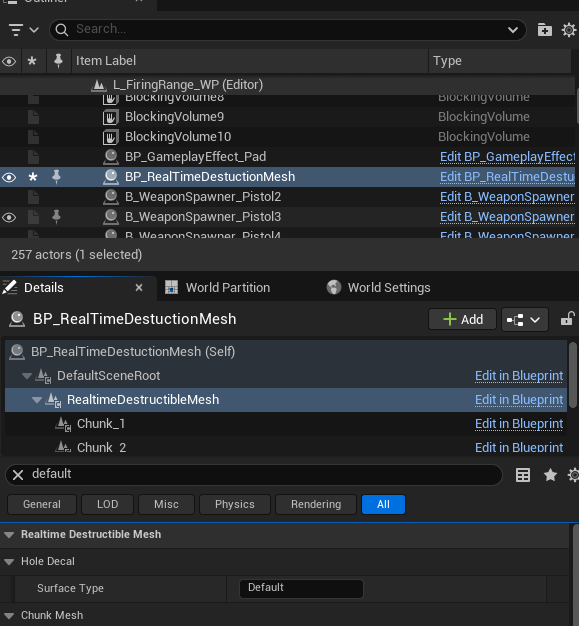
▲ Surface Type property in the Hole Decal category of the Realtime Destructible Component.